
Supplies:
(Supply list may contain affiliate links)
- Perler Beads (40 White, 11 Black, 42 – 60 Red)
- Perler Bead Large Square Pegboard
- Parchment Paper, or ironing paper that comes with Perler Beads
- Small Cup
- Stretch Cord or Elastic thread (optional)
- Big Hero 6 – Baymax Perler Bracelet Pattern (PDF)
Instructions:
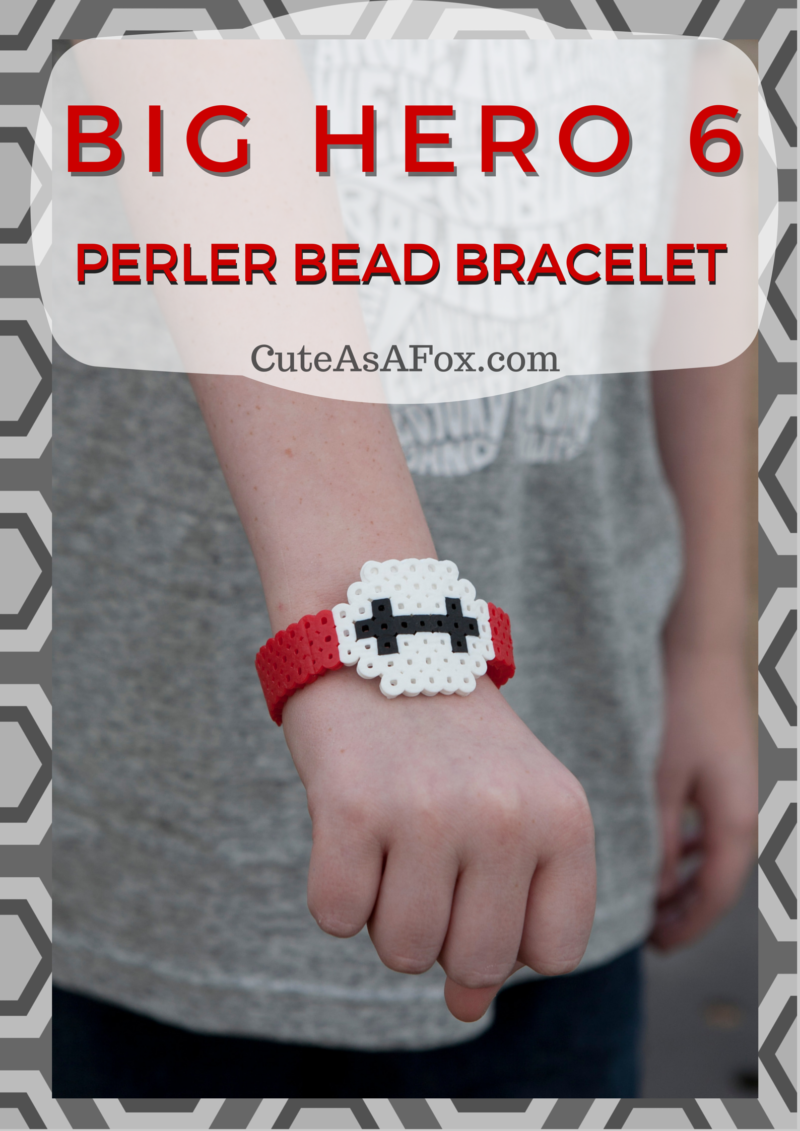
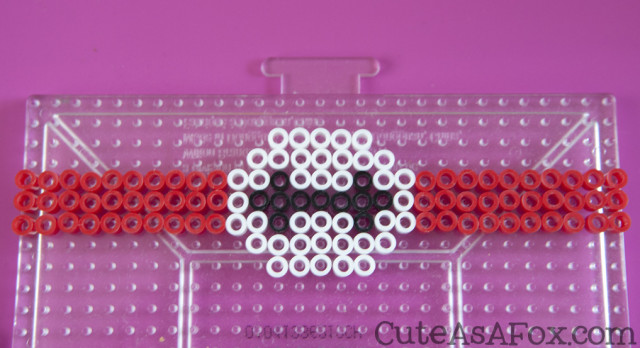
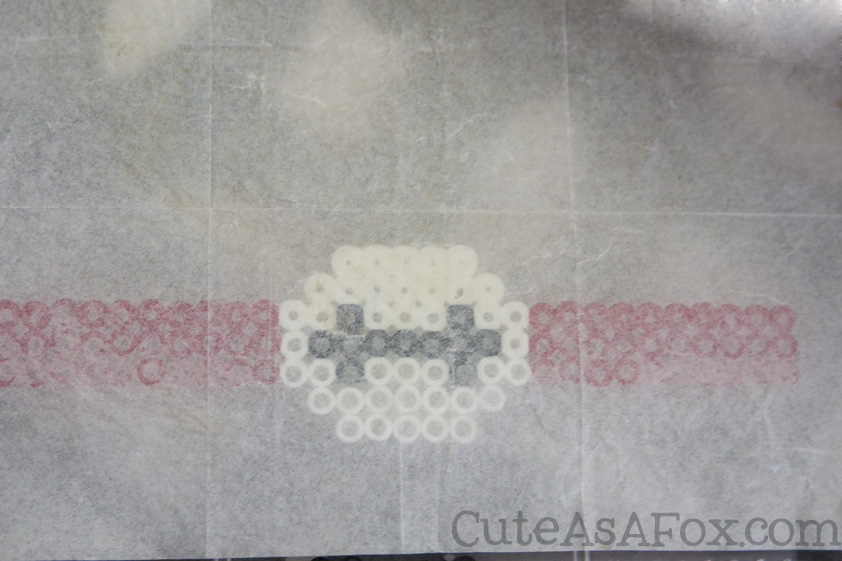
- Follow the pattern and layout the Baymax pattern on the Perler pegboard. 10 rows of red beads on each side will make a comfortable cuff for an adult wrist. You can use fewer rows of red to accommodate smaller wrists. I wouldn’t go smaller than 7 rows of red on each side of Baymax’s face.
- Adults only: Preheat a dry iron to medium heat. Place the piece of parchment paper over the design and gently iron the beads for about 10 seconds, constantly moving the iron. As the beads heat up you will be able to see them sticking to the parchment.
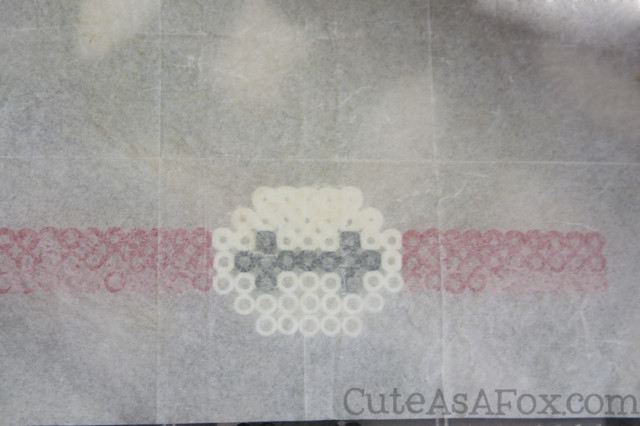
- Remove the design from the board. The bracelet will stick to the parchment, if the beads have been melted enough. Turn the design to the back and fold the parchment paper up to cover the back of the design. Your bracelet should now have parchment paper on the front and back of the design. Iron the back side of the design until the beads are completely fused together. You will be able to see through the parchment paper. You want them fused together securely but not flat as a pancake.

- Flip the bracelet back to the front side and iron a few more seconds, just to make sure both sides are hot.
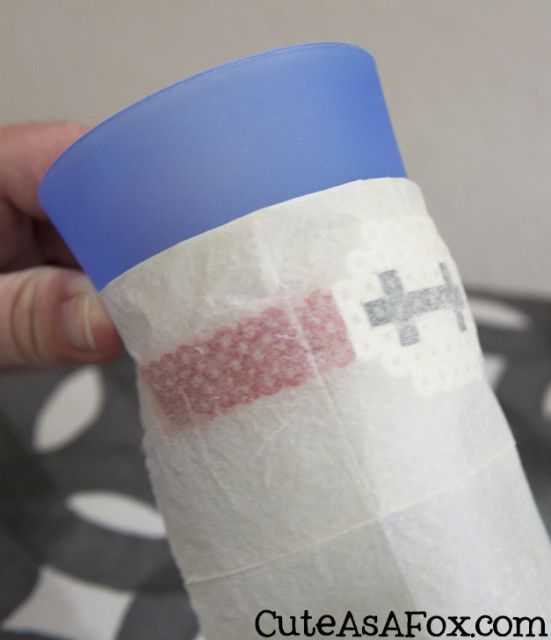
- Very carefully, hold the bracelet by the parchment paper and wrap around the bottom of a small drinking cup. This forms the cuff or bracelet shape. The plastic is extremely hot. Be very careful and avoid touching the plastic. Hold the bracelet in place a few minutes. When the plastic is cool enough to handle but still warm, peel off the parchment paper and continue to press into the bracelet shape if needed.
- Before the bracelet has cooled, thread some elastic string through the second to last row of each side of the bracelet. Tie it together for an easy way to get the bracelet on and off your wrist. If necessary, use a pick or needle to poke a bigger hole in the plastic. This is most easily done while the bracelet is warm. The cuff stayed on my arm fine without elastic thread, but kids will probably need it.


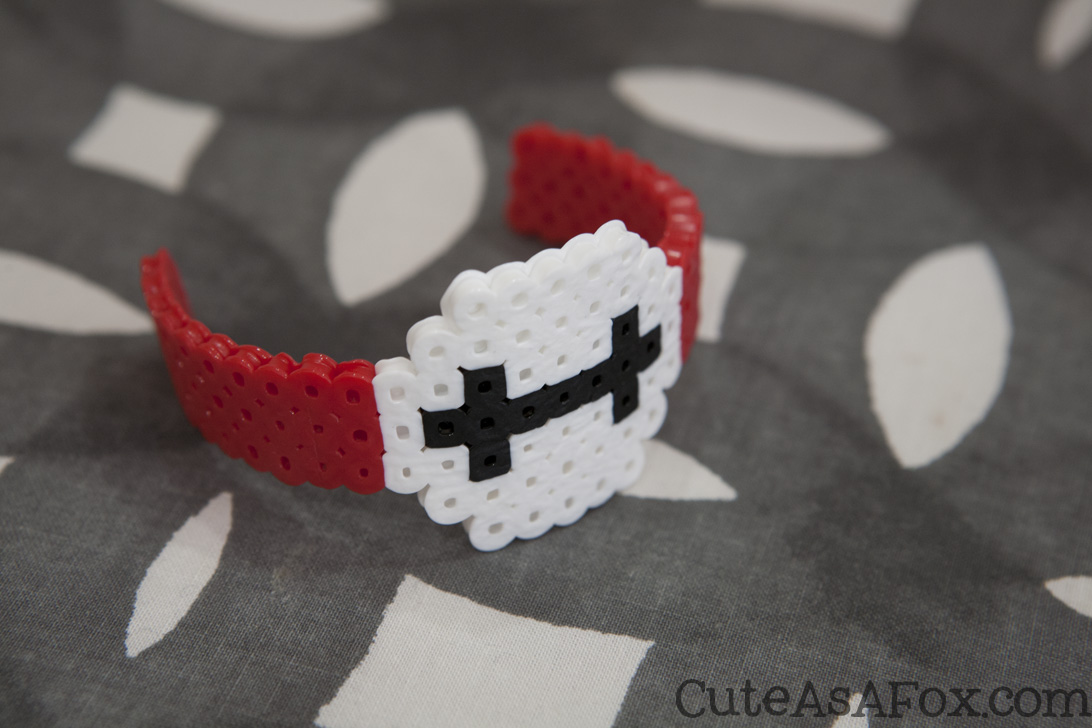
It takes a lot of words to explain, but it’s really quite simple and easy to do. Once I figured out the Baymax design, the only thing probably only took 10-15 minutes. My 9 year old absolutely loved this cuff. I was pleasantly surprised by how much he liked it!
I hope you’ll give it a try and let me know how it goes!
Recommended Reading:

Pages: 1 2

This is awesome! I had no idea you could make bracelets with Perler beads. Can’t wait to start experimenting with my kids.
Thanks! Perler bracelets really are so much fun to make!