
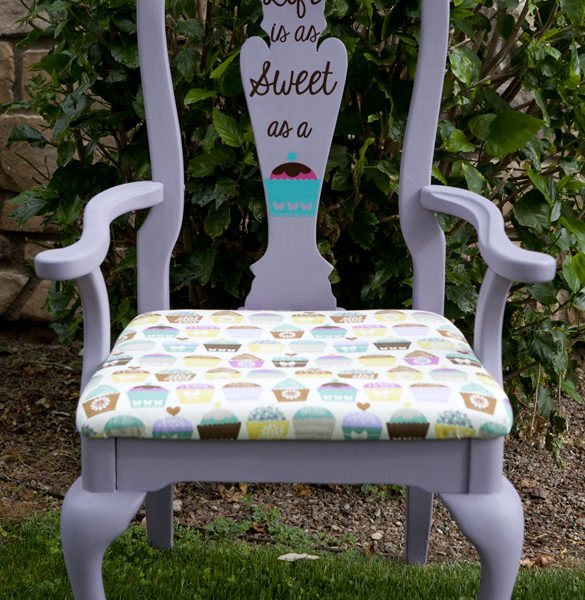
Vinyl – Up to this point, we had a fine looking chair but I wanted some extra pizzazz. It was going to be auctioned at an art walk. I found a cute cupcake saying online and I recreated one of the cupcakes from the fabric in my Silhouette Studio software. I cut the vinyl on my Silhouette Cameo and applied to the chair after the wax cured about 3 days. The vinyl did not want to stick to the wax finish. Not one little bit. Lots of burnishing and slowly removing the transfer tape finally did the trick. Once the transfer paper was off, the vinyl stuck to the chair great but it just did not want to come off the transfer tape.
The chair ended up selling for $65. That’s about how much I put into it after chalk paint, wax, fabric, brushes, etc. I do have some chalk paint and lots of wax left though, so take that into account.
Final thoughts:
I like full paint coverage. Brush strokes and the antique look is not my thing, mostly because I don’t know how to do it properly. Chalk paint may have not been the best option for this project. I found myself doing lots of coats and doing touch-ups here and there. Every time I was ready to apply the wax I would find a new spot that had some white peeking through. I love the way the chair turned out though. It was just more challenging to get the look I wanted, than I had anticipated. I’ll chalk that up to newbie issues.
Supply List:
- Annie Sloan Chalk Paint – Emile
- Annie Sloan Clear Wax
- Cupcake Fabric – “HS Sweet Tooth” from Joann in the home decor section
- Life is as Sweet as Cupcake Font: KG Eyes Wide Open
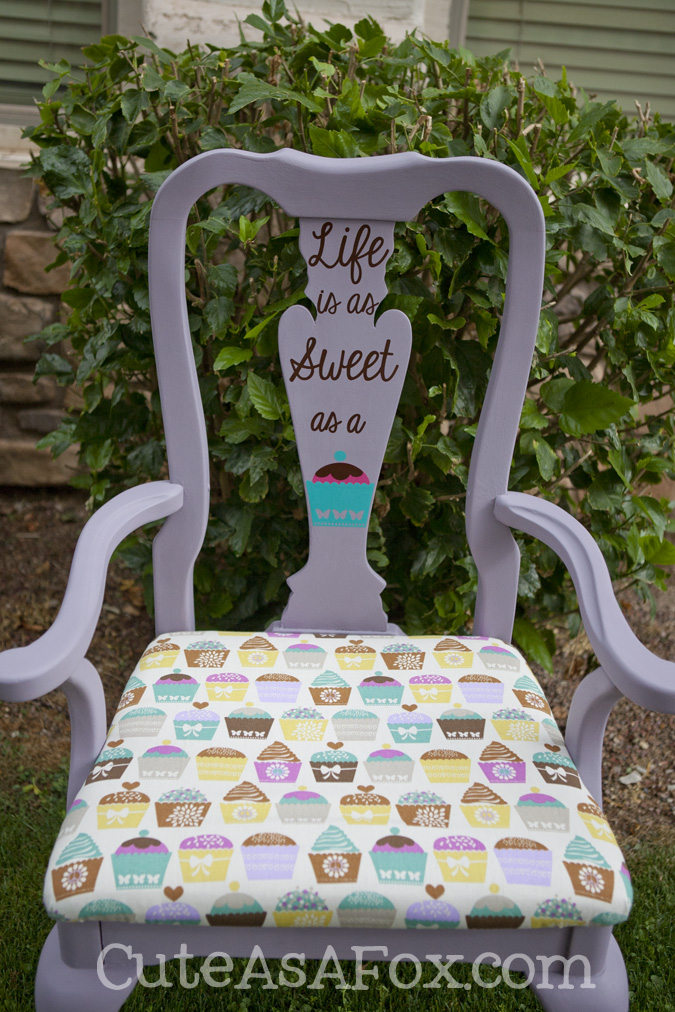
Here’s one more After shot of the happy cupcake chair.
 If you could redo a chair in any theme you wanted, what would you choose? There were some pretty awesome chairs at the auction, I think I’ll do a post just about that. People are so creative!


Leave a Reply